Using Slackware Docker Containers
Published: 2019-10-27 | Last Updated: 2022-01-09 | ~15 Minute Read
Introduction
Since I have been playing around with Docker and I really like Slackware Linux I thought a combination of the two would be amazing. I looked around the Docker Hub in order to see if there were any images that I could use. I didn’t find any official images, however I found an image created by vbatts that I could use, awesome!
Although that was a great way to see Slackware on Docker there was a small itch on my mind for making a base image on Docker that had nothing to do with any other image or base out there. A truly trusted image that I could use for deploying things on with a bit of peace of mind in that regard. Vincent has also created the necessary information in order to do that, yup he’s amazing.
So with the focus that Slackware has on stability and the ease of deployment of Docker I couldn’t wait to start using Slackware Docker containers.
Initial Troubles
Although I really wanted to start making my own base images I was left scratching my head after seeing a Makefile on vbatts' repository for Slackware on Docker. Why was a Makefile being used in this context?
It turns out that when creating custom images for docker it is more common than not to use Make in order to get a set of mechanisms in place to differentiate the requirements of one part of the build and another. My guess here is that vbatts is using this method for that reason.
So with that bit of information now in mind it made more sense to see a Makefile in the documentation. Now I had to see how the script worked.
Creating our first Slackware Docker image
I got to work on the image, I wanted to see a dry run of what make would be doing in order to better understand the process that I was about to launch, so after cloning the repository to my system I did:
$ make --dry-run
This yielded the following result:
    sudo \
      VERSION="14.2" \
      USER="user" \
      BUILD_NAME="slackware" \
      bash mkimage-slackware.sh
After seeing this I read over the contents of the mkimage-slackware.sh and noticed that this is where the base system is crated for the resulting image. This means that you can modify what packages are included in your base image, which creates the perfect opportunity to create custom base images using the base Slackware release packages. That is a big deal, again this means that you will get stability, size, and speed benefits due to the Slackware ways. I then ran the following:
$ make image IMG_NAME=myslack:14.2
With that the entire build process begins, after about 5 minutes we get a single file as the output slackware64-14.2.tar. That means that we are ready to import the image over to the docker ecosystem in order to start using it! After checking how this can be accomplished in Docker I found the following documentation about this. I learned that there is a docker import command in order to help aid with this operation.
We had a local file resulting from the make command we had just ran, so I used this to import the image:
$ cat slackware64-14.2.tar | docker import - myslack:14.2
Docker does the magic of making the image available to the runtime and then we can finally do the what we have been waiting for:
$ docker run -dit --name testingslack omega/slack:14.2 /bin/bash
Now we can access the container like so:
$ docker attach testingslack
This should land us in the bash shell that we launched in the previous docker run command:
 $ docker attach testingslack
 bash-4.3#
Note: In order to detach from the container you can use the Ctrl+P + Ctrl+Q key combination, please refer here for additional details on this detach method.
We are now, ladies and gentlemen, inside a bash shell in a Slackware environment within Docker…let that sit for a second, OK on we go.
At this point we can just fire up Apache and get web serving or some other cool thing that we’re used to from the default Slackware system right?…well not quite. I tried creating a file for testing inside a newly created folder using mkdir and touch:
 $ mkdir test
 $ cd test
 $ touch testfile.txt
 $ ls
 $ testfile.txt
Sweet right? I then tried to edit the file with vim:
 $  vim testfile.txt
 bash: vim: command not found
Um….what? Yup, as stated on the script provided by vbatts this Slackware system is not a full system (although you can create a full system as well, he provides the necessary files and information on how to do this on his repo). So this means that the system is hindered and incomplete right? Wrong! This means that we have absolute power over what get’s installed on our system. Vbatts has graciously provided us with a minimal Slackware system that offers the core functionality and we can build from there, oh the possibilities!
As with any traditional Linux distribution you have choices! and choices are good right? Well I believe so, although I also believe that you have to then make decisions, and I don’t about you but sometimes it’s hard for me to decide what program to install and/or use because well….there are so many possibilities. So then we face a typical spidey dilemma: “with great power comes great responsibility” so…what now?
Installing the vim program inside our Slackware Docker Container
Well making a decision on what to install to edit my files is not hard at all, let’s get vim setup. Just as a note here, Slackware’s default text editor elvis is included in the minimal image that gets created from the build. In case you have not heard of this editor before, you can take a look at its details in the man pages of a regular Slackware system or here.
So this is where things get Slacky..on Docker images that you need to install additional programs you usually see a Dockerfile that contains a RUN directive that includes the apt-get update & apt-get install commands native to Ubuntu’s Advanced Package Manager (APT). Slackware doesn’t manage packages that way however, but not to worry, it shouldn’t be too hard.
What we do have are are the installpkg and slackpkg tools native to Slackware, which will be more than enough to get vim installed. A big advantage that we have here is that vim comes as part of a full Slackware installation. What that means is that we have mirrors available to us with everything we need. We will simply have to ask slackpkg for help.
As part of the Slackware way of doing package management, there is no dependency resolution. This simply means that we have to take an extra step in order to know all the required files dependencies that vim will need to run. This is not as hard as it may seem (or may have been in the past). There is an amazing little tool called sbbdep that will help us to quickly get on our way here.
Finding program dependencies on Slackware
So we need a current Slackware system that has a working copy of the program that we are trying to run in order to to do this. Then we can simply use sbopkg in order to get the slackbuild for sbbdep built.
We can then, as the root user, run the sbopkg command and we get a menu for sbopkg (If this is the first time your run the sbopkg command you will be prompted to create the initial config):
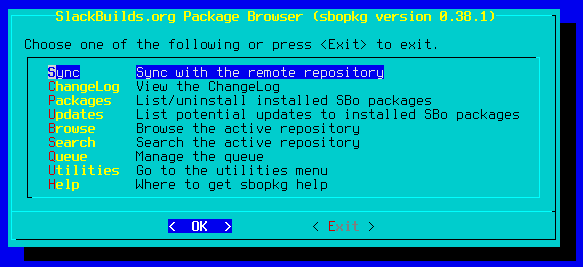
We then run a Sync in order to get all package information updated:
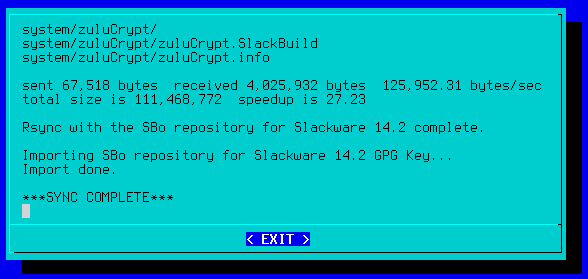
Now we can look for sbbdep within the sbopkg menus, first we navigate to Search and type in the name, we then get shown the results:
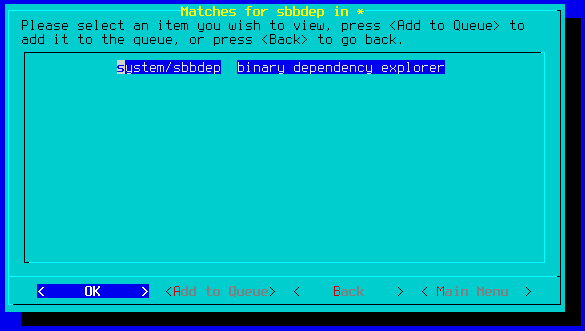
We select the package we want, in this case there is only one result and then select Process:
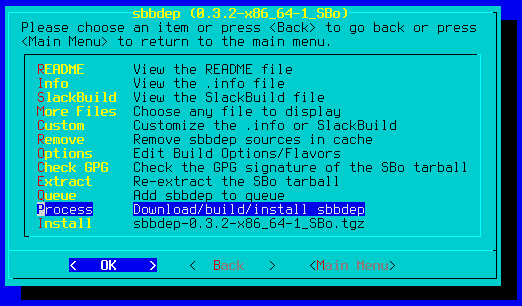
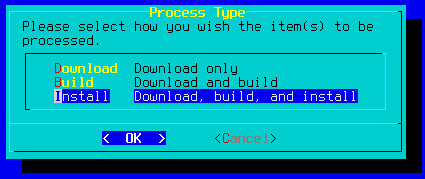
Now we get a small menu to choose the actions we want to have completed, we select Install and the package begins compiling based on the slackbuild for it.
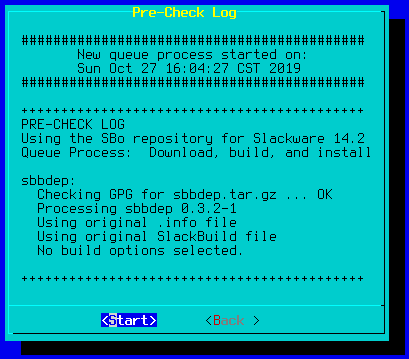
Finally we get a small summary of the actions that will be taken, we select Start here:
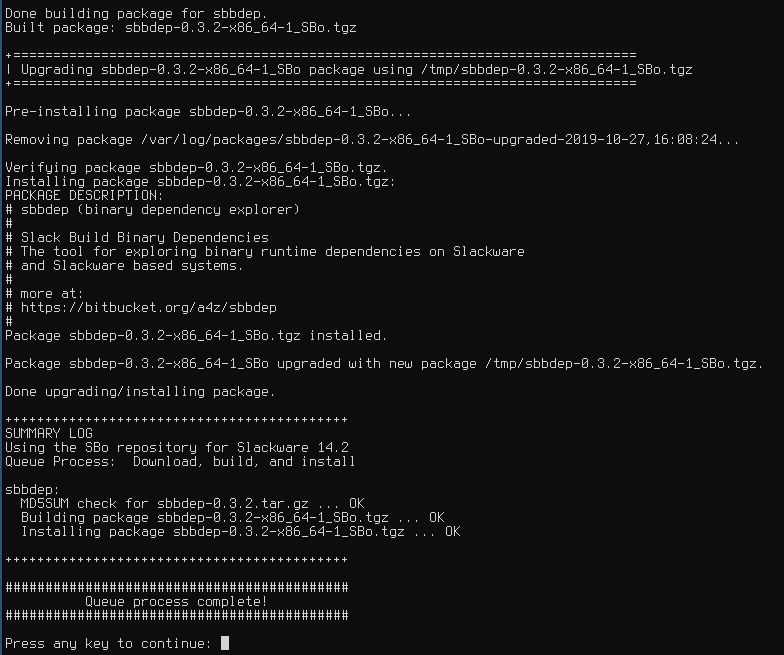
Once the package has been built and installed you should see something like the following:
Great so we can now use the package in our system to find the dependencies that vim needs to run. First we need to execute the command on its own in order for it to index the system’s packages:
$ sbbdep
Then we ask it to check up on vim like so:
$ sbbdep /var/adm/packages/vim-7.4.1938-x86_64-1
sync cache /home/user/.cache/sbbdep.db
cache up to date

aaa_elflibs = 14.2-x86_64-23 | acl = 2.2.52-x86_64-1
aaa_elflibs = 14.2-x86_64-23 | gpm = 1.20.7-x86_64-3
aaa_elflibs = 14.2-x86_64-23 | ncurses = 5.9-x86_64-4
glibc = 2.23-x86_64-4_slack14.2 | glibc-solibs = 2.23-x86_64-4_slack14.2
perl = 5.22.2-x86_64-1
python = 2.7.16-x86_64-1_slack14.2
Excellent!, now we know what packages are required by vim when it get’s invoked. All we have to do now is go make sure that we get the packages that we may be missing from a Slackware mirror along with the vim package. In order to find out which packages were missing I simply did a comparison of the output from the sbbdep command with the packages listed in the mkimage-slackware.sh script from the vbatts/slackware-container repo.
Since we have slackpkg available on our container we would simply run:
   $ slackpkg update gpg
   $ slackpkg update
   $ slackpkg install perl
   $ slackpkg install python-2.7
   $ slackpkg install vim-7.4
We could have also done a single slackpkg command of course, but I wanted to do one by one for this testing and make sure everything went OK, the alternative would be:
   $ slackpkg update gpg
   $ slackpkg update
   $ slackpkg install perl python-2.7 vim-7.4
Once we have the program and it’s dependencies installed we can simply do vim testfile.txt and voila! We now have a working text editor on our Slackware container.
While this is possible to do on our container, and I wanted to show it just because it’s easy to accomplish it does not mean that this is the best approach. Since containers' storage is ephemeral this change would not persist if we delete our container, additionally if we built another container from our base image it would not have vim installed by default as this is something that is not part of the core image.
Conclusion
So we have a way to create a Docker image from zero, we do need to build it on an already existing Slackware system however. Ideally that system would have been installed from trusted sources and so the resulting Docker container is to be trusted as well. So that avoids the whole “I don’t know what was put into this image” concern that some may have.
On top of a trusted system we have the resource usage of a container, at idle the resulting image from our testing today uses ~1.5MB of RAM and sits at a nice 0.00 on CPU, not too shabby right?
The next steps would be to see how we can install a few programs that may be of more help than vim for actual use, stay tuned for that!